Edit: I updated my RP GIT server and made more notes here.
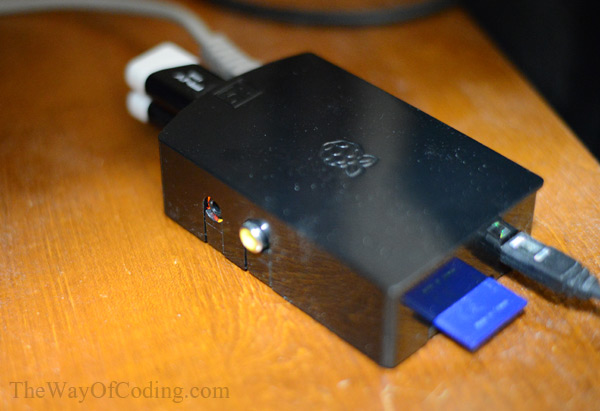
Here are my notes for setting up GIT on Raspberry Pi and using a Windows client (TortoiseGit). I’ve been using this little thing as a GIT server for around 5 months now and I love it. Here is the quick notes I took while getting things setup. It’s probably really disjointed, but you might find some helpful tips in here.
www.raspberrypi.org
http://www.raspberrypi.org/downloads
NOOBS (offline and network install)
http://downloads.raspberrypi.org/NOOBS_latest
Format your SD card using the SD Card Association’s formatting tool.
https://www.sdcard.org/downloads/formatter_4/
Install Raspbian (GIT seemed to be pre-installed on the version I used):
The defaults:
username: pi
password: raspberry
When greeted with the post install program, find the advanced option to enable SSH. You can also change your password from there.
2017 Edit: I’m in the process of installing it on a larger SD card. Anything over 32GB will probably require an extra formatting step detailed here. The current install takes the user directly to the GUI operating system after it is finished setting things up. You need to go into the start (raspberry) button >> “Preferences” >> “Raspberry Pi Configuration” to find options. From there you can switch it up to boot from the command line instead of the GUI.
Once you are at a command prompt you can do this to enable SSH:
– Enter sudo raspi-config in a terminal window
– Select Interfacing Options
– Navigate to and select SSH
– Choose Yes
– Select Ok
– Choose Finish
Once you are setup, you can slim down what NOOBS pre-installs into the OS thanks to this person who made this script.
Download PuTTY for SSH (used for the remote command line interface):
http://www.putty.org/
A Windows installer for everything except PuTTYtel
Download and install Window GIT:
https://git-for-windows.github.io/
Download and install Tortoise GIT:
https://tortoisegit.org/
Linking RP and your client with source code:
Create the local repository by adding a folder to your computer and right-clicking on it and selecting “Git create repository here…” from the context menu.
Generate your SSH keys:
Use Puttygen to make the keys, save both the public and private keys. Name the private key with a .ppk extension.
Seems to be optional if you do everything on the same local network.
—————————
SSH to your pi
1. install git to your pi
sudo apt-get install git git-core
2. add a user 'git', or you can use other name
sudo adduser --system --shell /bin/bash --gecos 'git version control by pi' --group --home /home/git git
3. set the password for the new user
sudo passwd git
4. use the user 'git' to make an empty repository
su git
cd /home/git
mkdir repo.git
cd repo.git
git --bare init
Back to your working machine where you have a folder you want to push to the new GIT server:
You can use TortoiseGit to set things up.
Right-click on the main folder. Select Git Create Repository here.
Right-click >> TortoiseGIT >> Settings >> Remote…
From there you can add server details.
Remote: A name you want to call it.
URL: something like git@X.X.X.X:repo.git
Where X.X.X.X would be the IP address of the new server on your local network.
The Push URL is the same as the URL.
All of the other options can be left default unless you made a Putty Key earlier.
—————————–
TortoiseGit settings:
Settings >> Git
Select Global so you can edit the User Info fields
Name: git
Email: none
Select something like “Git Sync…” when right-clicking on your repo.
Remote URL input, click the “Manage” button
Remote: a name like “RaspGIT”
URL = git@192.168.0.10:repo.git
Putty key: the private key you made before
—————————–
I have the RP setup with two USB thumb drives as backup. Right now they are setup as RAID 1 and get updated with a program called Unison.
RAID 1 on RP device:
http://blog.drewwithers.com/2013/11/raspberry-pi-usb-raid1-root-partition.html
http://jeddi.org/b/2013/08/26/crypted-raid5-usb-on-raspberry-pi/
sudo apt-get install hdparm lvm2 mdadm
sudo fdisk -l
df -h
sudo mount -l
sudo mkfs.ntfs /dev/sda1 -f -v -I -L untitled
http://linuxconfig.org/linux-software-raid-1-setup
http://www.howtoforge.com/software-raid1-grub-boot-debian-etch
http://www.howtoforge.com/how-to-set-up-software-raid1-on-a-running-system-incl-grub2-configuration-debian-squeeze-p2
http://ubuntuforums.org/showthread.php?t=884556
mdadm –create /dev/md0 –level=1 –raid-devices=2 –force /dev/sda /dev/sdb
apt-get install dosfstools
mkdosfs -F 32 -I /dev/md0
sudo fdisk -l
hdparm -t /dev/md0 (test the speed)
pi@raspgit /etc/mdadm $ sudo mdadm –detail –scan
ARRAY /dev/md0 metadata=1.2 name=raspgit:0 UUID=00000000:00000000:00000000:00000000
sudo pico /etc/mdadm/mdadm.conf
That should be it for it to auto initialize and run…
—————————–
sudo apt-get install unison
http://fabianpeter.de/cloud/hybrid-cloud-with-unison-and-owncloud/
http://fabianpeter.de/in-a-nutshell/run-raspbian-from-usb-stick/
http://peter-butkovic.blogspot.com/2013/08/raspberry-pi-driven-dropbox-alternative.html
http://www.markus-gattol.name/ws/unison.html
pico /etc/fstab
*** Add the below line:
/dev/md0 /media/raid auto defaults 0 0
http://askubuntu.com/questions/113733/how-do-i-correctly-mount-a-ntfs-partition-in-etc-fstab
http://raspberrywebserver.com/serveradmin/connect-your-raspberry-pi-to-a-USB-hard-disk.html
Status:
cat /proc/mdstat
sudo mdadm –detail /dev/md0
http://www.granneman.com/techinfo/security/backup/unisonbackup/
ls -a (show hidden directories)
unison -ui text -auto default.prf
—————————————————–
touch ~/.unison/unison.prf
pico ~/.unison/unison.prf
# Unison preferences file
# For local synchronisation:
# Roots of the synchronization:
root = /home/git
root = /media/raid1/git
perms = 0
dontchmod = true
ignorecase = true
links = false
ignoreinodenumbers = true
# Some regexps specifying names and paths to ignore
ignore = Name temp.*
ignore = Name *~
ignore = Name .*~
ignore = Path */pilot/backup/Archive_*
ignore = Name *.o
ignore = Name *.tmp
—————————————————————–
http://www.howtoforge.com/setting-up-unison-file-synchronization-between-two-servers-on-debian-squeeze
http://xmodulo.com/2013/09/synchronize-files-between-two-servers.html
http://www.jacobbudin.com/2013/09/an-introduction-to-file-synchronization-with-unison/
force = /home/git
http://www.pgbovine.net/unison_guide.htm
http://www.pgbovine.net/unison-for-your-mom.htm
http://www.answeredubuntu.com/109488/how_can_i_run_this_script_on_startup_restart_and_shutdown#sthash.ggon19H3.dpbs
———————————————————-
http://caseonetech.com/blog/unison-server
http://ubuntuforums.org/showthread.php?t=869219
0 19 * * * /usr/bin/unison [options]
crontab -u USERNAME cronjobs.txt
crontab -l
unison for -batch, ask no questions
crontab -e
30 * * * * /usr/bin/unison -batch “default” >> /home/pi/unison.log
To view mail from crontab:
cat /var/spool/mail/pi
Recovery from a live cd:
http://askubuntu.com/questions/15933/how-to-access-md-raid-via-live-cd
sudo apt-get install mdadm
sudo mdadm –assemble –scan
That’s everything so far. Though, what I need to do is make a backup of the OS SD card, but I haven’t done that.